OneSpan Sign for Beginners: How to Create and Send Your First Package (OneSpan Sign UI)

I am new to OneSpan, so I thought it would be a good idea to start a blog series about using electronic signatures and OneSpan Sign for beginners. The blog series will be titled "OneSpan Sign for New Users" with various topics covered along the way. This first blog in the series will explain how to create a Sandbox account and send your first document package, using the OneSpan Sign UI.
OneSpan Sign for Beginners: Creating a Sandbox Account in the OneSpan Sign UI
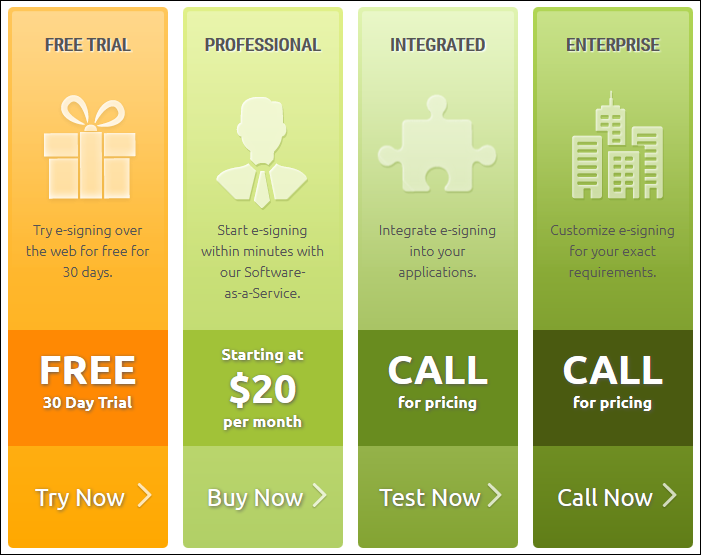
First things first, if you have not created a Sandbox account, you will need to do that. Navigate to https://sandbox.esignlive.com/ in your browser. If you already have an account, log in. If you do not, click "Sign up", in the top right corner of the page or in the login form in the middle of the page. After that, click "Test Now" under the "Integrated" option.
That link will take you to a sign up form to get a Sandbox account. Once you have filled out the form, select "Create Developer Account" and you will be automatically logged into your Sandbox account.
Creating and Sending a Package
Once logged in, you’ll see a quick start tutorial that will show the necessary steps to create a package. I’ve included those three slides here. We’ll follow these steps to create and send a package.
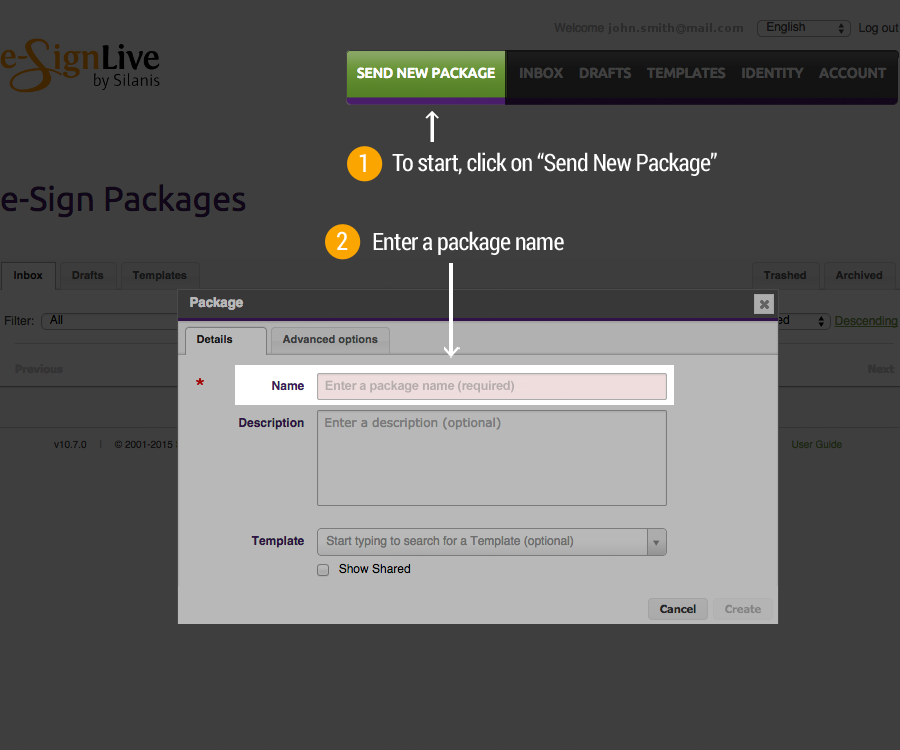
Slide 1:
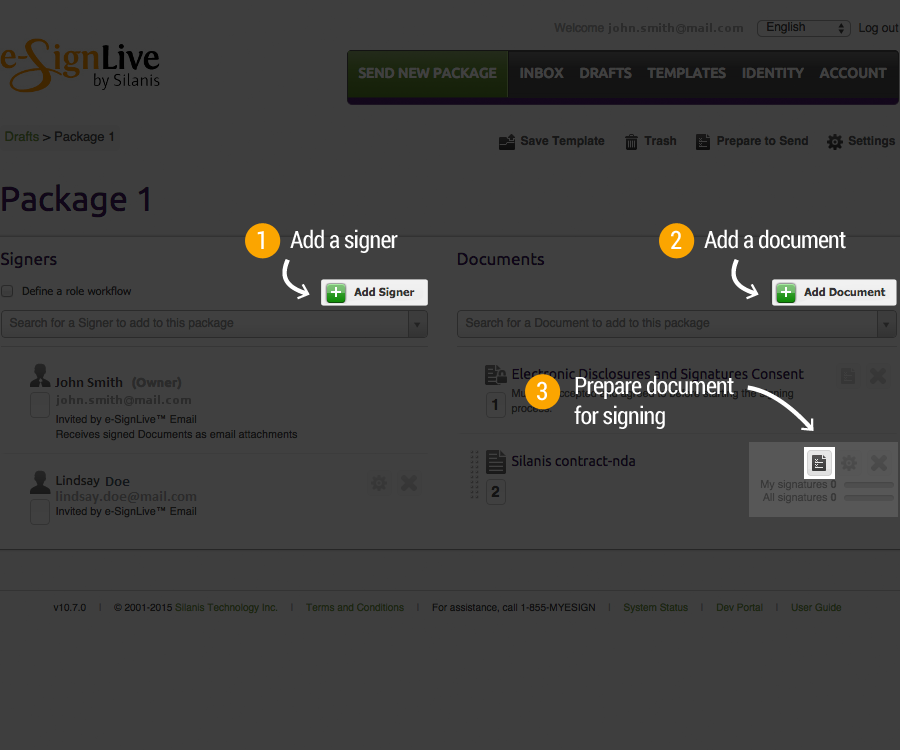
Slide 2:
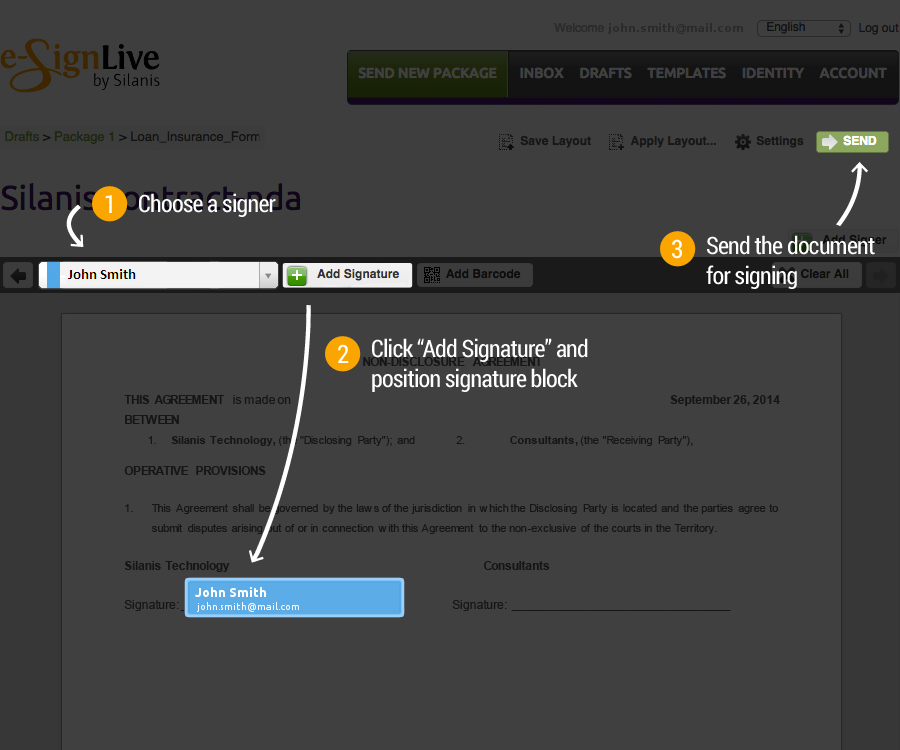
Slide 3:
Creating a Package
Following slide 1, above, go ahead and click on "Send New Package". Enter a name for your package. I entered "Test Package". If you want to add a description, you can, but this property is optional. There is also an option to select a template, if you have previously saved a package as a template.

Once you have entered a name for your package, you can now go to the advanced options tab.
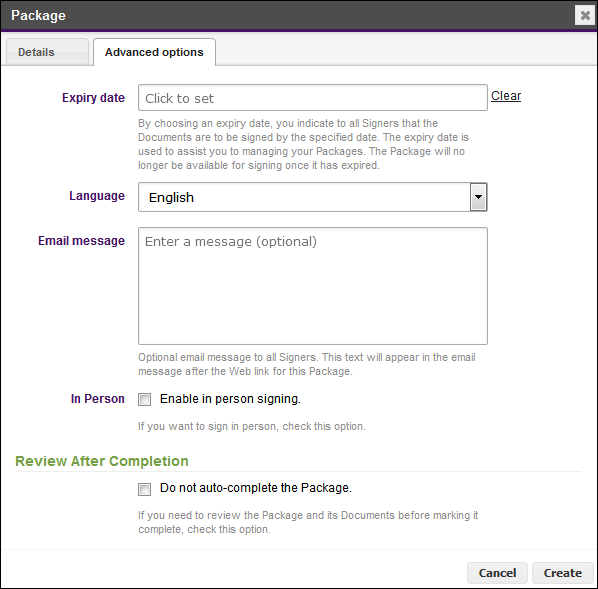
Here you can set an expiration date, choose your preferred language for the package, enter an additional email message to package recipients, choose to enable in-person signing, and you can also choose to review a package before you allow it to be filed as "complete". For this example, we will leave all of these at their default settings.

OneSpan Developer Community
Join the OneSpan Developer Community! Forums, blogs, documentation, SDK downloads, and more.
Join TodayOnce you have chosen all the options you need, click on "Create". This will bring you to the draft view of your package, like in the below image:
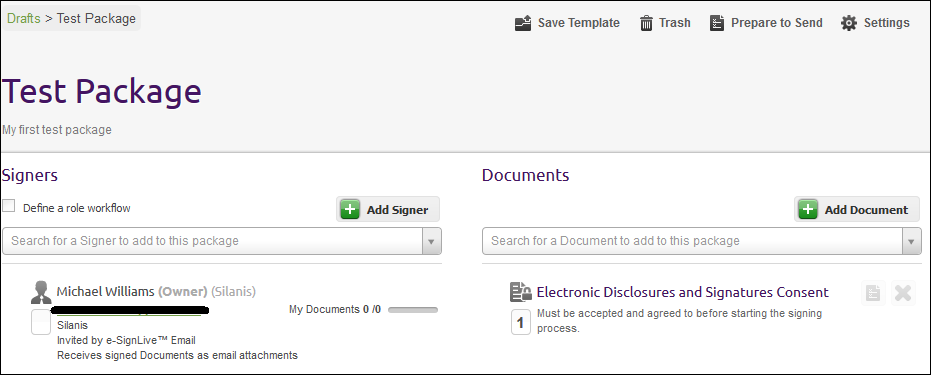
You will see that you have been added as a signer on the package and that a document, "Electronic Disclosures and Signatures Consent", has been added to the package. The document is one that must be accepted by each signer prior to signing any documents in the package.
Adding Signers and Documents
Moving on to slide 2, from above, we will now add a new signer and a document to our package.
Click on "Add Signer". You’ll be prompted with a form to add your new signer’s information.
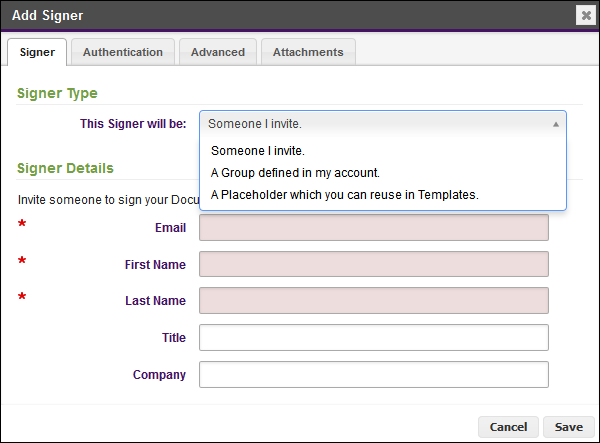
There are a few options for signer type. It can be someone you invite, a group you have defined within your OneSpan Sign account, or you can leave a placeholder if you are creating a template. For this exercise, we’ll choose "Someone I invite".
Now, fill out your signer details. You can either use dummy information like in the slides above, but if you want to follow along with the signature portion of my next blog, you should use an email account you have access to.
Once you have filled out the required fields (Email, First Name, and Last Name), you can go to the authentication tab.
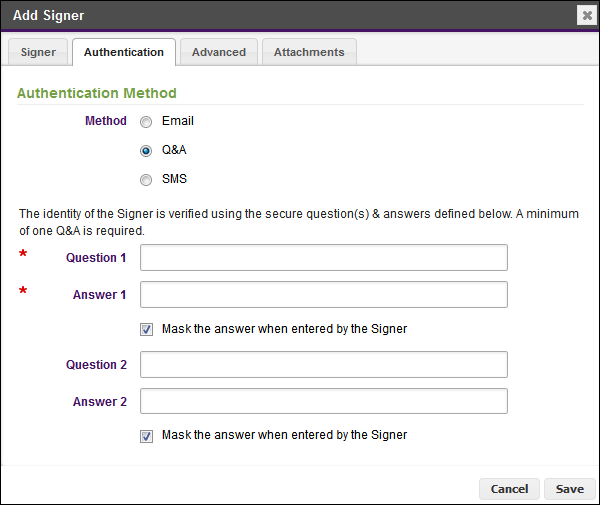
Here you can set different options to authenticate your signer. The default option is "Email". You can also do Q&A (pictured) or send a SMS code to the signer’s cell phone. They must enter the code before signing.
The advanced tab contains a few more options to customize the interaction with your signer. You can send a personalized message, choose to allow automatic email delivery of documents to signers, and allow the signer that you appoint to appoint another signer in their place.
Finally, the attachments tab allows you to specify documents that you would like the signer to upload before signing any documents (example: copy of driver’s license).
For this example, we will leave the defaults for everything and hit "Save".
To add a new document, simply click on "Add Document", navigate to the file location, and select open.
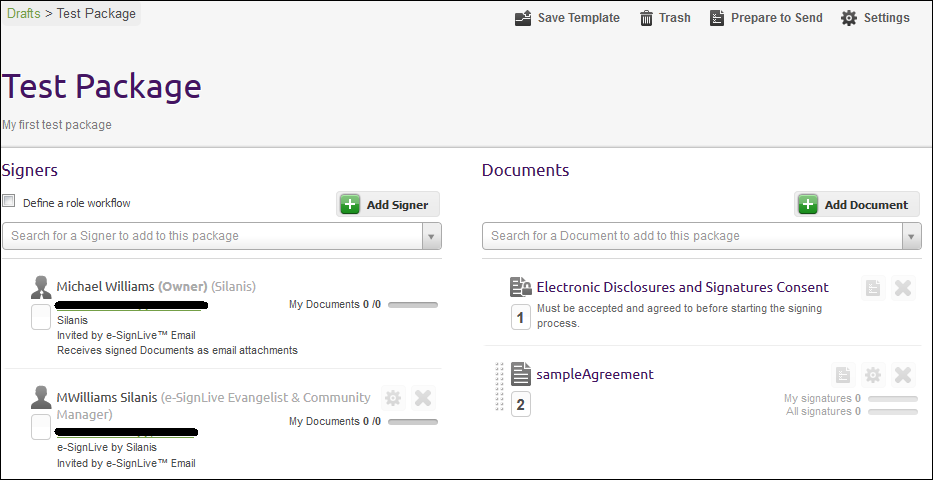
With your new signer and document added, you should see something like the following image in your package draft view:
Add Signature Boxes to Document and Send
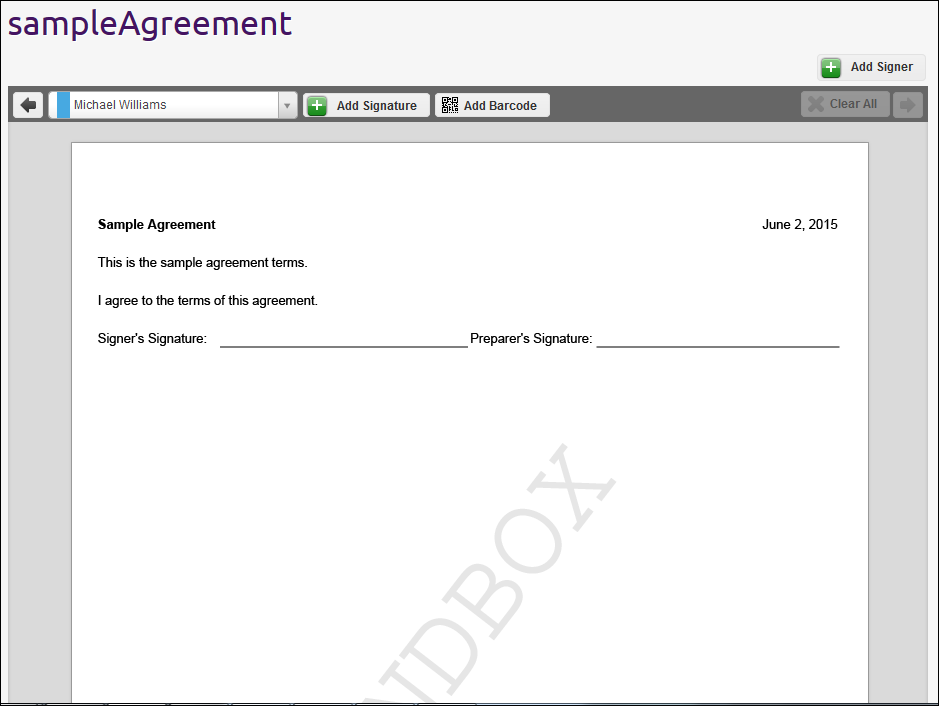
As seen in Slide 2, above, you'll see an option for preparing your document for signature to the right of the document name. When you click on this, you’ll see a screen like the following:
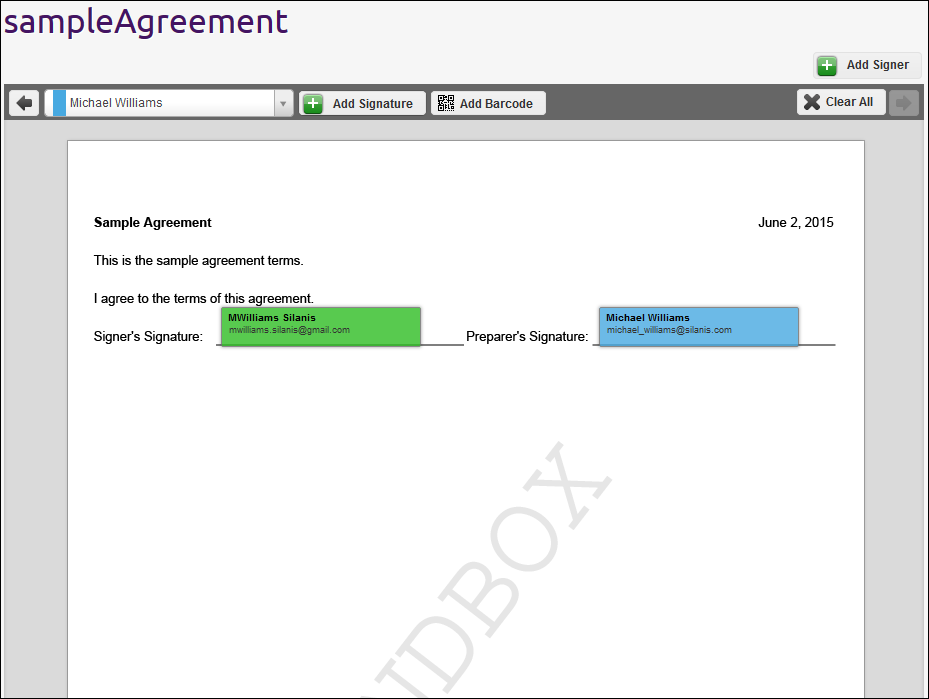
To add a signature box, choose the signer you want to add first, then, click on "Add Signature". A signature box will appear on the document, and you drag it to the desired location. For my example, I will choose "MWilliams OneSpan" from the drop-down and add the signature block to the signer's signature location. Then, I will do the same for "Michael Williams", except that I'll add the signature block to the Preparer's Signature location. After doing this, here is what we see:
If you hover over a signature box, you will see a gear icon appear. If you click on this icon, you will have more options available, like adding extra fields (example: date) and changing the signature type (click to sign, click to initial, or capture signature). For this simple example, I have kept everything at the default settings.
Now that our document is ready to go, we click on "Send" as shown in slide 3 and we are done. Our signers will now be notified via email that they have a request to sign a document.
Thanks for reading! If you have questions, feel free to post questions in the comments section below. Next time, I will continue on with what happens next: signing a document, viewing the evidence summary, downloading the completed package, and archiving the package. Links to all of the posts from this blog series can be found below.
OneSpan Sign for Beginners Blog Series
- Create and Send a Package Using the UI
- You Sent a Package, What Now? (UI)
- Create and Send a Package with the Java SDK
- Check Package Status and Download Files with the Java SDK
- Create and Send a Package with the .NET SDK
- Check Package Status and Download Files with the .NET SDK
- Create and Send a Package using REST with C#
- Check Package Status and Download Files using REST with C#
- Create and Send a Package using REST with Java
- Check Package Status and Download Files using REST with Java