OneSpan Sign Release 11.24: Upload Accessible Document in Sender UI

Version 11.24 of OneSpan Sign has recently been deployed to the preview and sandbox environment. In this latest version, we extended the sender UI allowing Ad Hoc users to map PDF Form Fields to recipients' OneSpan Sign fields when creating an ADA compliant package or template, enabled bulk sending to configure personal certificate signing for its recipients, and added a couple of bug fixes. You can find the deployment dates for all our environments on our Trust Center page.
In this blog, we’ll focus on the newly implemented sender UI, which allows non-integrated users to map PDF forms to OneSpan Sign fields during uploading accessible documents. By walking through the package creation process, you will have a better image of what you can expect.
Step 0: Prepare Accessible PDF
To make an accessible PDF, first tag all text contents. Then indicate which fields are for "Signature Forms" and which are "Text Field Forms".
The image below corresponds to a demo document used throughout this blog. You may download the demo document here.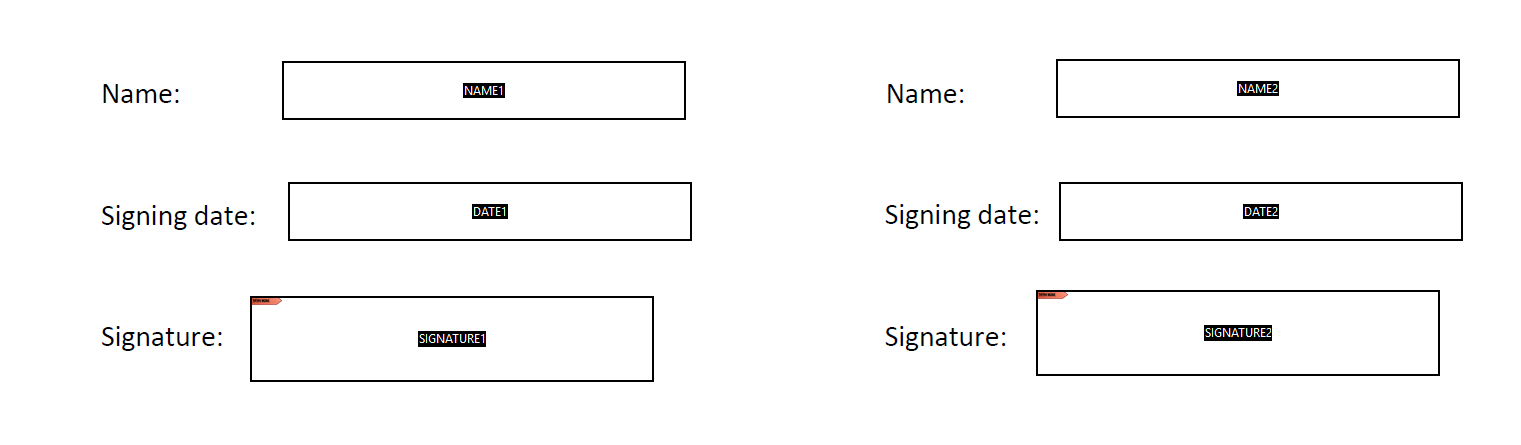
Refer to our Accessibity Support documentation for best practices regarding PDF tagging and preparing your ADA PDF.
Step 1. Switch On Accessibility Setting
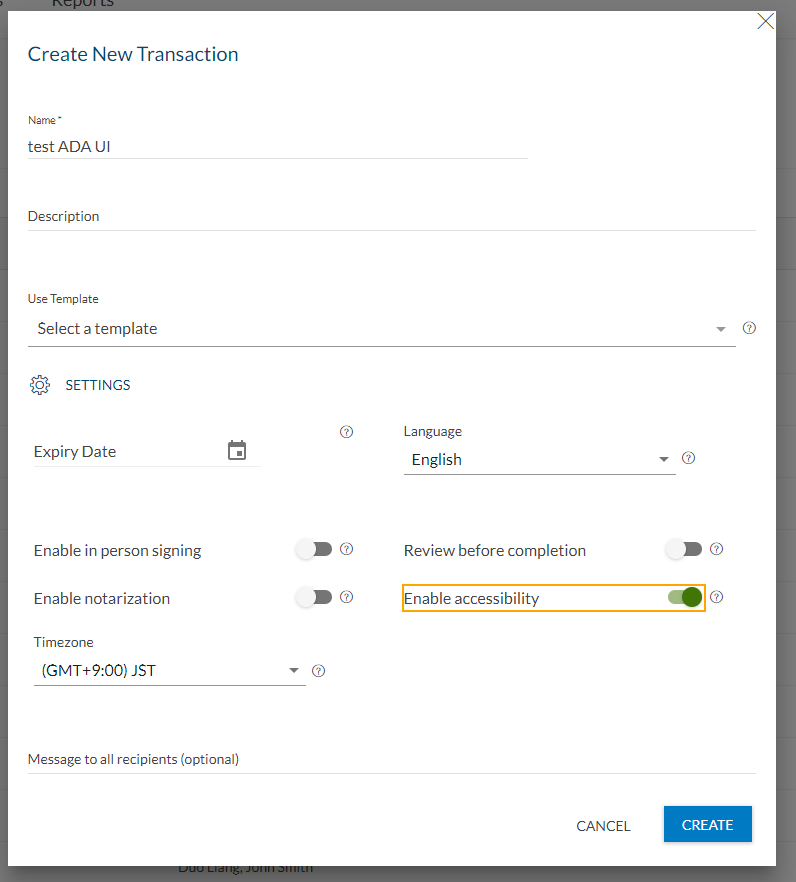
Now, you are ready to create an ADA package via web portal. The first thing you need to do is enable accessibility at your package level. You can turn it on default by changing your account level setting through our Technical Support.
There are also two other options. You can either activate it the on the initial package creation page, as shown below.
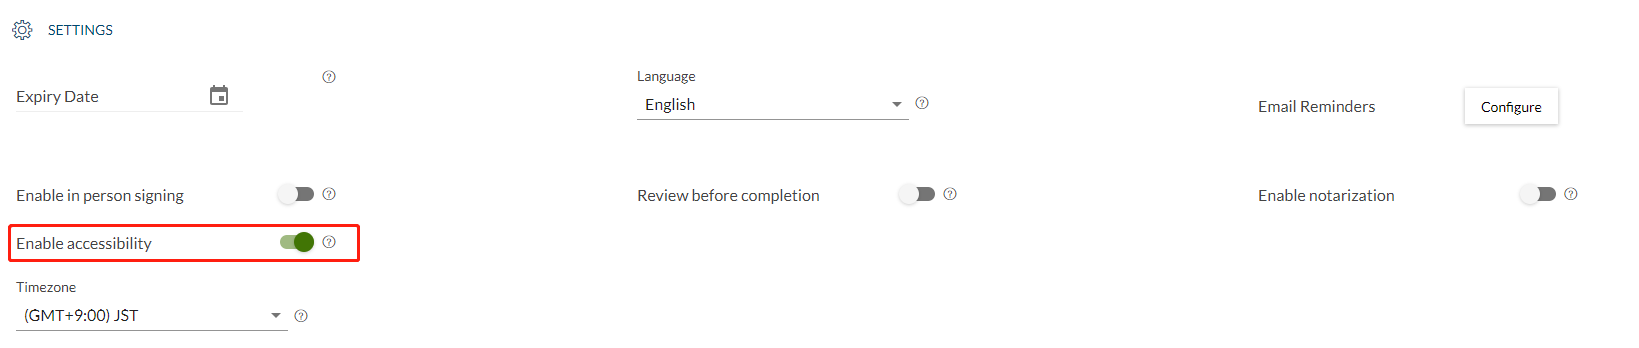
Or, you can switch it on in the package settings section after your package is created. But, this option is only available when there’s no document associated with your package (including the default-consent document).
Step 2. Upload the PDF
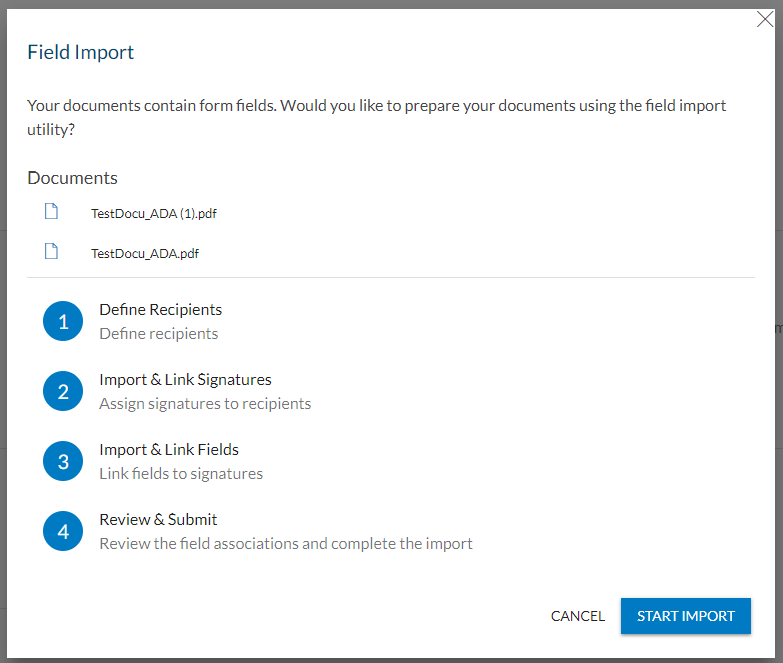
Select “Add Document” to upload your prepared PDF. You may upload multiple documents at the same time. The ADA page will recognize the additional documents and load them for later steps.
Step 3: Add Recipients
If you haven’t added signers, the first ADA page gives you a second chance to do so.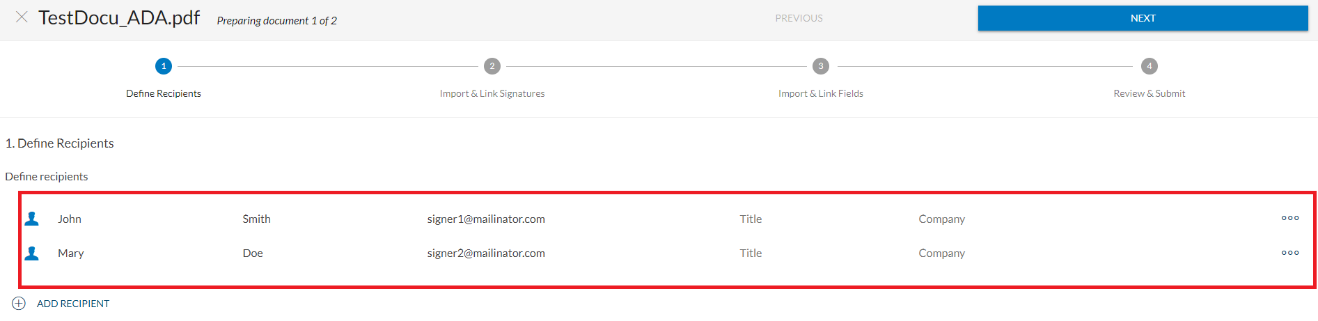
Step 4: Link Signatures & Fields
This page will recognize all Signature Forms on your PDF and let you map them to OneSpan Sign signature fields and bind them to your recipients. 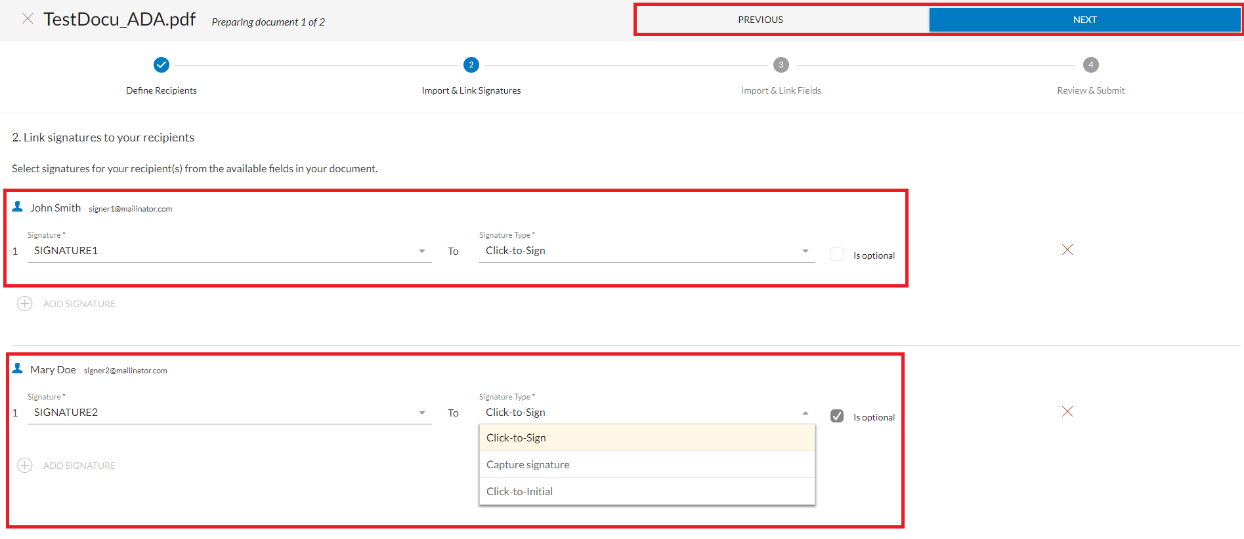
You can also move back and forward through buttons on top of the screen if any information was entered incorrectly in previous pages.
Similar to signature fields, all Text Field Forms on your PDF will be imported and available in the dropdown menu. Under the proper signature of a signer, you can match them to OneSpan Sign field types according to your design.
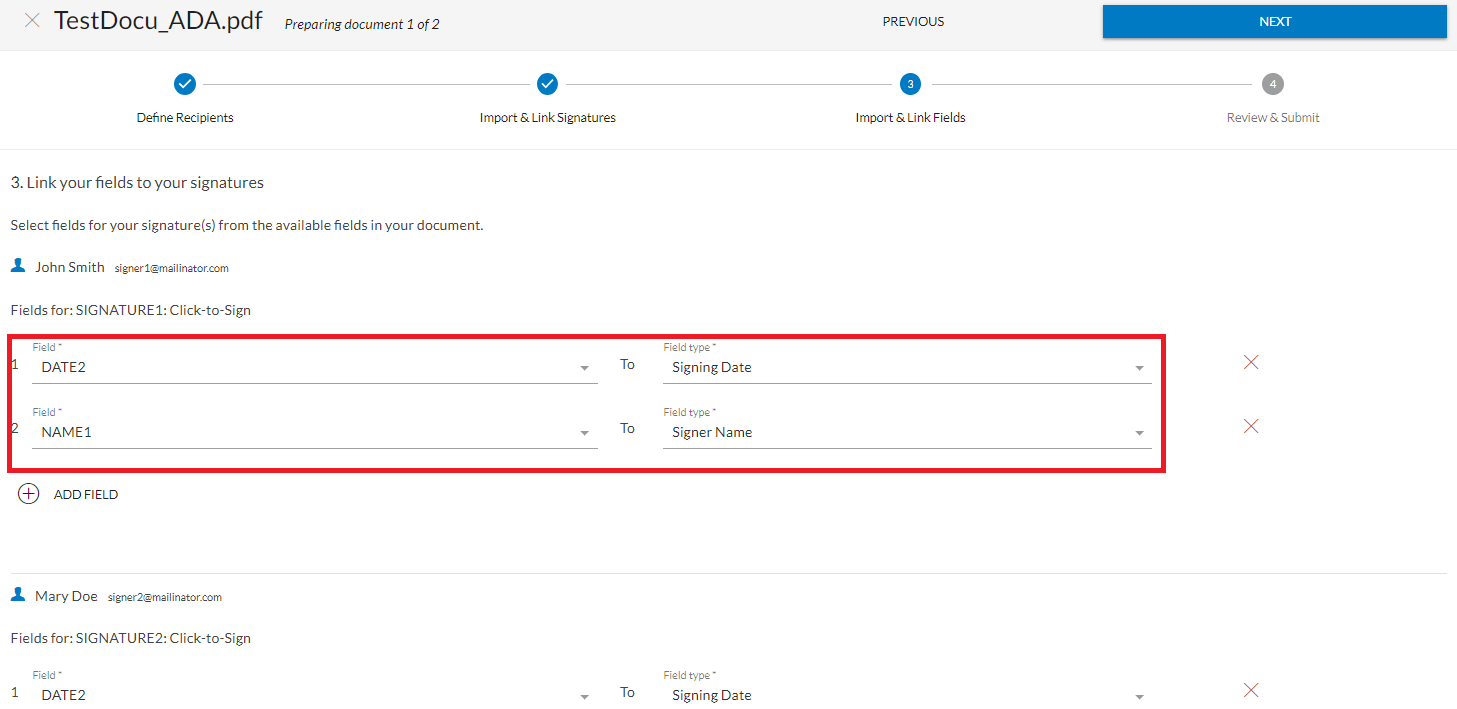
Note, label and list fields are not currently available for the match list.
Step 5: Review
As a final step, ADA pages provide you with an overall review of your previous settings.
In addition, if any PDF form is left unassociated, a warning message will display with a detailed missing list. This ensures fewer errors in the process.
Click "Done" after completing your last accessible document, and you are almost there! 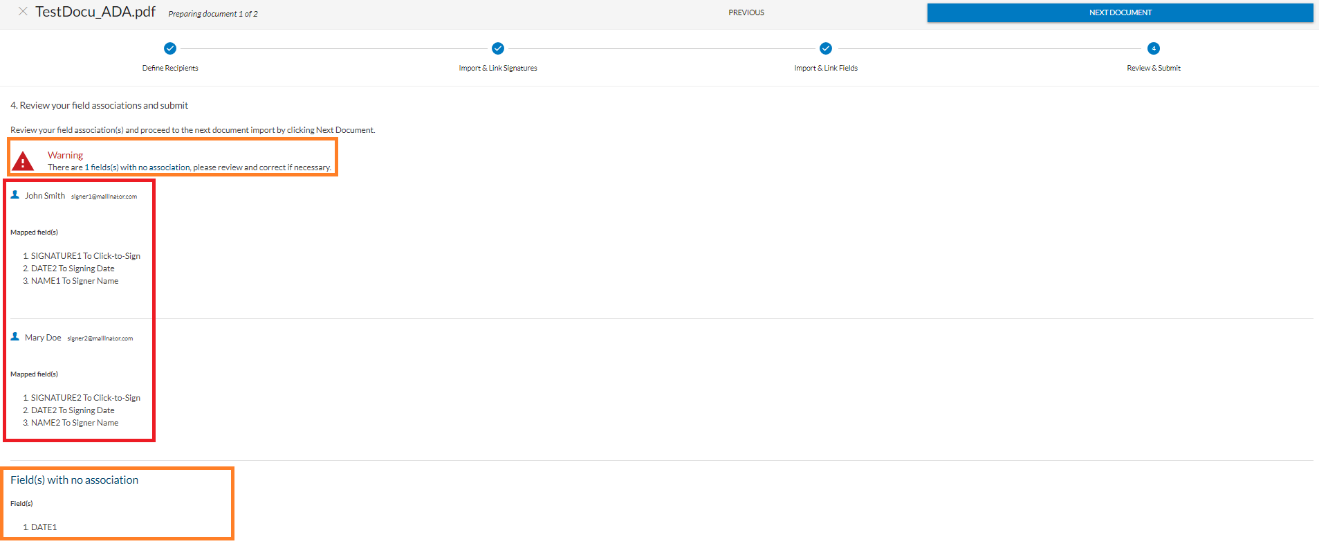
Step 6: Send Package
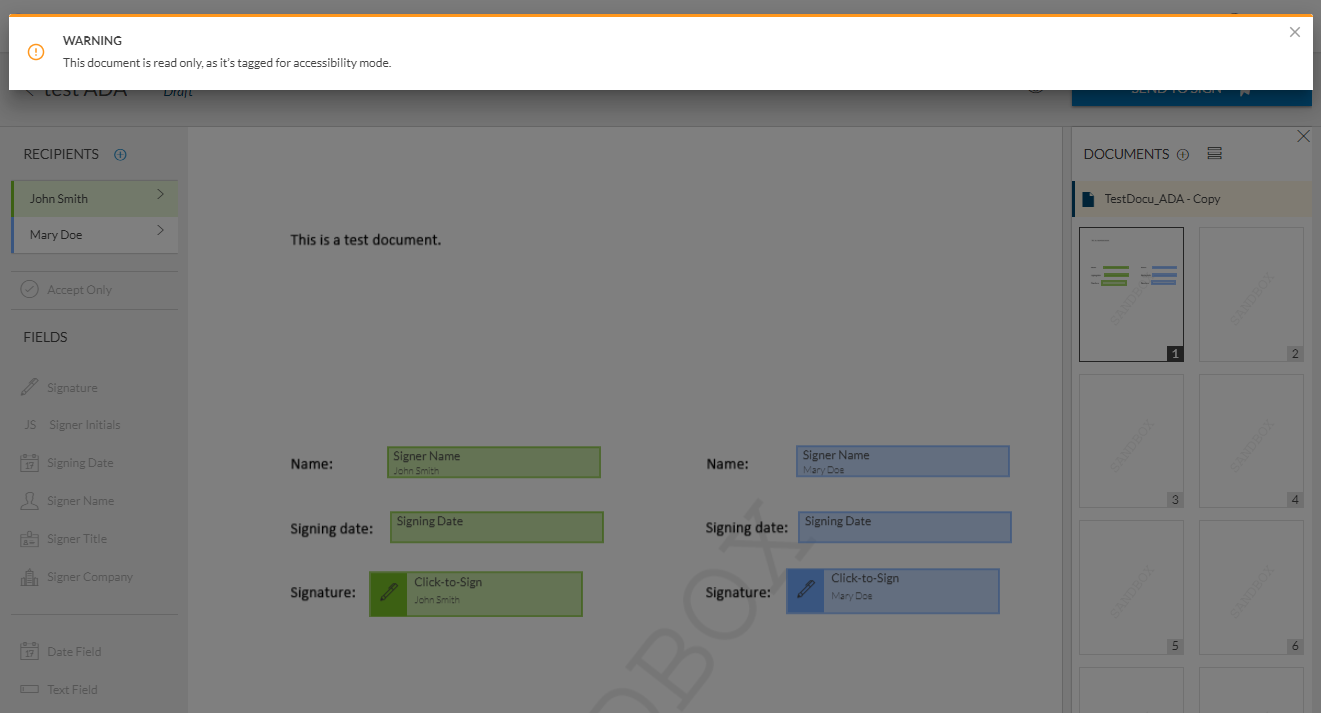
When on the designer page, the system will remind you that ADA documents are read-only. Click “Send Package”, and the whole process is complete.
If you have any questions regarding this blog or anything else concerning integrating OneSpan Sign into your application, visit the Developer Community Forums. Your feedback matters to us!

OneSpan Developer Community
Join the OneSpan Developer Community! Forums, blogs, documentation, SDK downloads, and more.
Join Today