OneSpan Sign Developer: Creating a Notarized Package – Part 4

From a notary’s standpoint, it’s important to complete all parts of the Notary journal entry before finishing the notarization, especially when it’s required by your state. Therefore, OneSpan Sign provides the E-Journal feature to streamline your experience completing and keeping the notary journal entries.
As the fourth part of this ongoing blog series, we will introduce how to use the e-Journal entries feature and then address how to “Update Professional Fields” and “Remove Notary Signer” in the code. Without further ado, let’s start!
E-Notary Journal Entries
At any point during a signing process, you can click on “Journal” in the actions bar to create a journal entry. 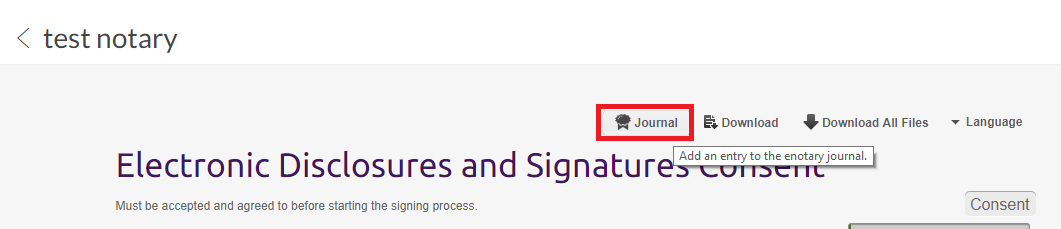
An E-Journal Entry panel should be displayed like below. The elaborations of all fields can be found in this documentation: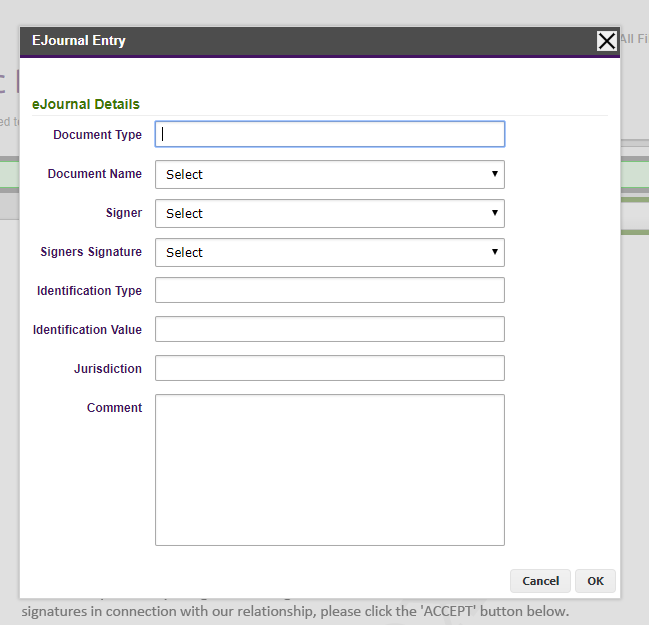
Once a notary created a journal, it’s recorded at OneSpan Sign system by the notary’s account level. Head up to the notary’s Web Portal, you will see all historical journals in “Admin” – “Journal” page: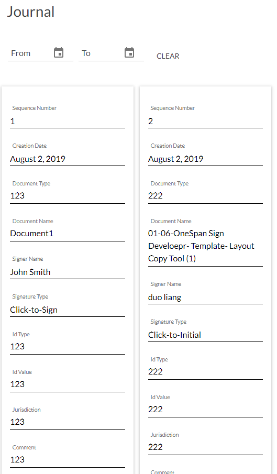
For integrated users, journal entries for this sender can also be retrieved in JSON or CSV format through REST or SDK methods.
Note: in this case, notary should be under your main account, because you need the person’s sender ID to pass into the API path.
REST API
HTTP Request
GET /api/user/{senderUId}/journal
HTTP Headers
Accept: application/json
Content-Type: application/json or text/csv
Authorization: Basic api_key
This API call will deliver a complete list of journals created by this sender by default. The parameters below can be used to narrow the result:
“?startDate=2019-04-01&endDate=2019-07-10”
Java SDK
sdkJournalEntries = eslClient.getPackageService().getJournalEntries(senderUID);
csvJournalEntries = eslClient.getPackageService().getJournalEntriesAsCSV(senderUID);
.NET SDK
sdkJournalEntries = eslClient.PackageService.GetJournalEntries(senderUID);
csvJournalEntries = eslClient.GetPackageService.GetJournalEntriesAsCSV(senderUID);
Updating Professional Fields
In the first part of this blog series, we reviewed how to create and update notary fields. Here, we’ve included a quick refresher along with the necessary code implementation.
(1) Make sure your account has enabled the notary signing feature and that the sender is configured as a notary.
(2) Send field names, types (SEAL or REGULAR), and values to our support team. From there, our team will help you create the fields.
(3) Once the fields have been created, you can update the field values on your own side. Our code will start with a dictionary of names, values, and a sender ID.
            var apiKey = "your_api_key";
            var apiUrl = "https://sandbox.esignlive.com/api";

            var senderId = "18EZDL44xgsX";
            var notaryFields = new Dictionary<string, string>()
            {
                {"NotaryJurisdiction","Montreal"},
                {"NotaryLicenseExpiryDate","2020-09-02"},
                {"STAMP","20190609\\nTest1\\nTest2\\nTest3"}
            };

            var entries = notaryFields.Select(d =>
                string.Format("{{\"id\":\"{0}\",\"value\":\"{1}\"}}", d.Key, d.Value));
            var jsonString = "{\"professionalIdentityFields\": [" + string.Join(",", entries) + "]}";

            Debug.WriteLine(jsonString);

            using (HttpClient myClient = new HttpClient())
            {
                myClient.DefaultRequestHeaders.Authorization = new AuthenticationHeaderValue("Basic", apiKey);
                myClient.DefaultRequestHeaders.Add("Accept", "application/json");

                StringContent requestContent = new StringContent(jsonString.ToString(), Encoding.UTF8, "application/json");
                var result = myClient.PostAsync(apiUrl + "/account/senders/" + senderId, requestContent).Result;

                if (result.StatusCode != HttpStatusCode.OK)
                {
                    throw new Exception(result.Content.ReadAsStringAsync().Result);
                }
            }
            Debug.WriteLine("successfully updated notary fields!");
If a valid sender ID under your account was not inputted correctly, you will see the 404 error below from the OneSpan Sign server:
{
  "name": "Resource Not Found",
  "code": 404,
  "technical": "Could not find user with uid '18EZDL44xgsX123'",
  "messageKey": "error.notFound.userNotFound",
  "message": "The specified user cannot be found."
}
Similarly, a wrong field name will yield the server error below:
{
    "code": 400,
    "technical": "Professional identity field does not exist.",
    "messageKey": "error.validation.professionalIdentityField.notFound",
    "name": "Validation Error",
    "message": "Professional identity field does not exist."
}
With this exception handling, your application will know that there’s no error in the middle and all fields have been successfully updated.
Note: Only field values can be updated after their creation. To modify professional field name or type, you’d first delete the field through our support team.
Remove Notary Signer
When trying to make a recipient an inactive notary or when switching active notaries, the update will fail if notary fields already exist on any document within the transaction. You will receive a message that reads, "Some of the transaction documents contain notary fields. The notary fields must be removed before resetting a recipient as an inactive notary or before switching the active notary."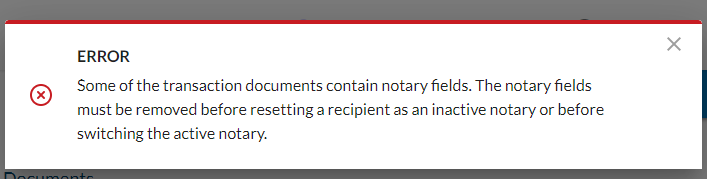
In Web UI, you then must go to the designer page and manually remove all assigned notary fields. For an integrated application, the sample code below gives you an idea of how to programmatically remove all notary fields for a transaction:
        EslClient eslClient = new EslClient(apiKey, apiUrl);
        string packageId = "DDrWc2V6VC-NVAbS2P-lF4mVnP0=";

        DocumentPackage pkg = eslClient.GetPackage(new PackageId(packageId));

        foreach (var document in pkg.Documents) {
            foreach (var signature in document.Signatures)
            {
                foreach (var field in signature.Fields) {
                    if(field.Style == FieldStyle.UNBOUND_CUSTOM_FIELD || field.Style == FieldStyle.SEAL) {
                        eslClient.ApprovalService.DeleteField(new PackageId(packageId), document.Id, signature.Id, field.Id);
                    }
                }
            }
        }
If you have any questions regarding this blog or anything else concerning integrating OneSpan Sign into your application, visit the Developer Community Forums. Your feedback matters to us!
Browse the Other Entries in this Blog series:
• Creating a Notarized Package – Part 1
• Creating a Notarized Package – Part 2
• Creating a Notarized Package – Part 3

OneSpan Developer Community
Join the OneSpan Developer Community! Forums, blogs, documentation, SDK downloads, and more.
Join Today