OneSpan Sign How To: Document Extraction (.NET SDK)

I have seen a couple questions recently about using document extraction, so I thought it would be good to create a blog about it. Anytime I do a blog about how to use a feature, I will put it under the "OneSpan Sign How To" series.
Configuring the PDF Form Fields
First things first, you will need a PDF with form fields, named how OneSpan Sign can recognize them. You can see more about the proper format of the form field names in the documentation. Below is the PDF document that I used. I put the form field names on the fields in the image to show what I named everything.
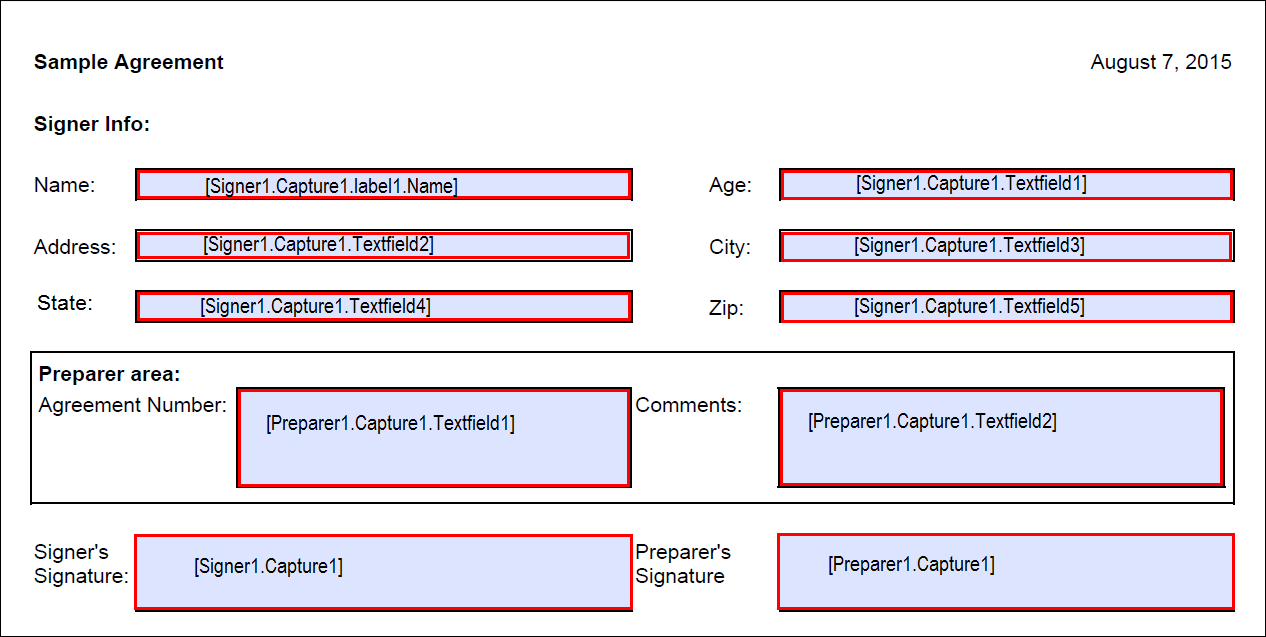
As you can see, the two signers on the document will be "Signer1" and "Preparer1". These will be the custom IDs used in the code section below, letting OneSpan Sign know what fields to associate with each signer.

OneSpan Developer Community
Join the OneSpan Developer Community! Forums, blogs, documentation, SDK downloads, and more.
Join TodayThe Code
So, with your document set up properly, you can now write your code. For this blog, I will be using C# and the OneSpan Sign .NET SDK. Below, you will find the code I used for my example PDF, above.
using System;
using System.IO;
using Silanis.ESL.SDK;
using Silanis.ESL.SDK.Builder;
using System.Diagnostics;

namespace CreateAndSendPackage
{
    class CreateAndSendPackage
    {
        private static String apiUrl = "https://sandbox.esignlive.com/api";
        private static String apiKey = "YOUR_API_KEY";

        public static void Main(string[] args)
        {
            EslClient eslClient = new EslClient(apiKey, apiUrl);
            FileStream fileStream1 = File.OpenRead("C:/PATH_TO_FILE/sampleDocumentExtract.pdf");

            DocumentPackage superDuperPackage = PackageBuilder.NewPackageNamed("Test Document Extraction")
                .WithSettings(DocumentPackageSettingsBuilder.NewDocumentPackageSettings())
                    .WithSigner(SignerBuilder.NewSignerWithEmail("[email protected]")
                                .WithFirstName("John")
                                .WithLastName("Smith")
                                .WithCustomId("Signer1")
                    )
                    .WithSigner(SignerBuilder.NewSignerWithEmail("[email protected]")
                                .WithFirstName("Michael")
                                .WithLastName("Williams")
                                .WithCustomId("Preparer1")
                    )
                    .WithDocument(DocumentBuilder.NewDocumentNamed("testDocumentExtraction")
                                  .FromStream(fileStream1, DocumentType.PDF)
                                  .EnableExtraction()
                                 )
                    .Build();
            PackageId packageId = eslClient.CreatePackage(superDuperPackage);
            eslClient.SendPackage(packageId);
        }
    }
}
The code for this example is quite simple and the part of it that is associated with just this feature is even simpler. In each "WithSigner" call, you will see that the custom IDs coincide with the ones in the image of the PDF form shown earlier in the blog. The .WithDocument also has a call to "EnableExtraction". Because this is done, you might notice that you do not have to define the signature locations and who needs to sign the document. This is already taken care of with the Ids and the associated form field names from the PDF.
What it looks like
Once your run this code, the package is created with the appropriate fields for each signer. This is what Signer1 will see:
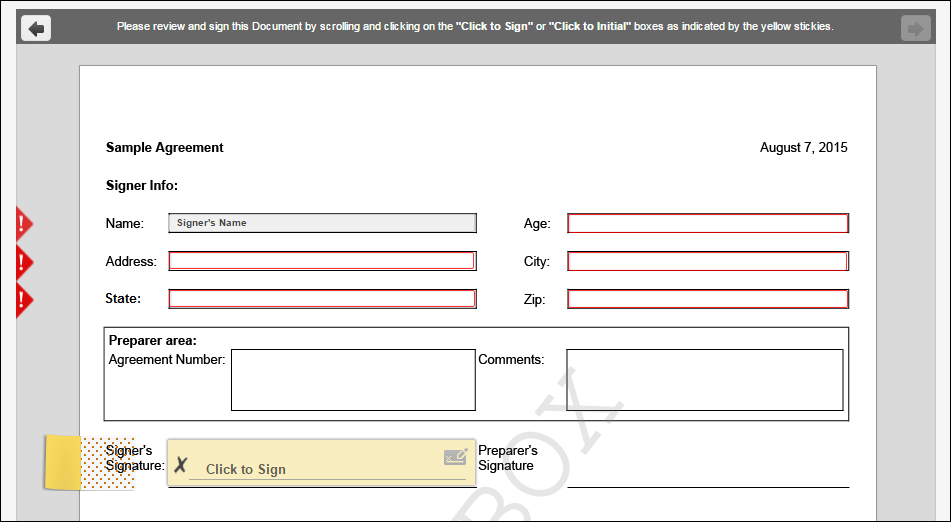
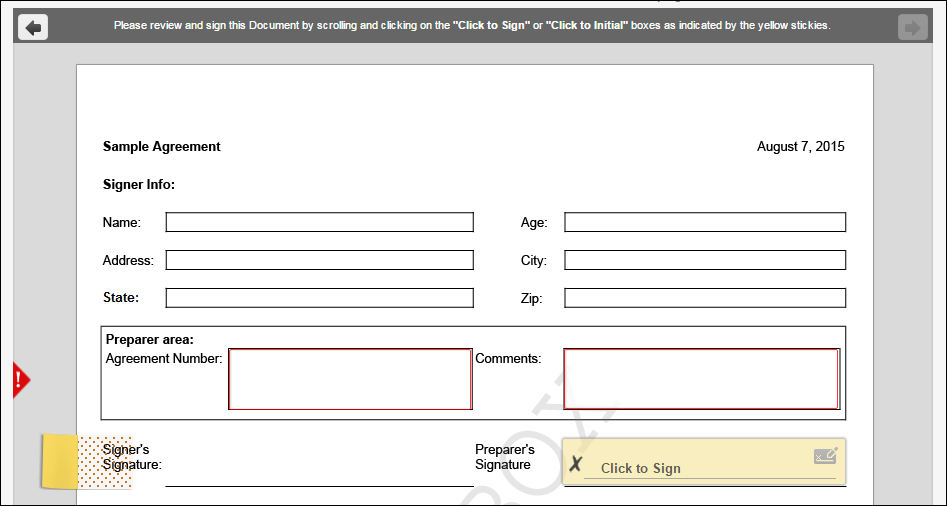
As you see, the required fields are highlighted for the user to fill out. The Name field will be filled in automatically by OneSpan Sign when the signing is complete. Likewise, the preparer sees this:
There you have it. The signing process happens just as you have defined it in your package. Thanks for reading! If you have any questions or there are any topics you would like to see covered in my blog, feel free to post in the comments section.